


Event planning is in my blood, I love to host a great party – it’s something about the process, the research to the execution to the finished product is a true high for me. In the season that I am currently in, I am lucky enough to not only be becoming and aunt once this year, but twice (how many ladies are lucky enough to say that!) When my sister-in-law posed the idea for a boho chic, unique baby shower, I ran with the idea.
 Combining elements that were both whimsical with lots of bright colors, textures, and greenery was my game plan. I needed a few key items to really bring this story to life.
Backdrop: Every millennial needs a photo wall for their event. I was on the hunt for macrame backdrop, which I couldn’t believe I found a bunch on Amazon that were reasonably priced.
Wicker Throne: Or better known as peacock chairs in their heyday, I was able to borrow one of these vintage wicker throne chairs from a friend. I have been keeping my eye out and I have found a few at local thrift stores.
Fresh Florals: Lucky for our family, my in-laws are 4th generation florists owning Reynebeau by Riverside Floral in Little Chute, Wisconsin. And we really got spoiled for this event. They made us multiple fresh floral garlands that we used throughout the space, aside from the table arrangements.


Aside from just the decor, we decided to add a really fun unique twist to this shower. Instead of the traditional games, we did an activity of making floral crowns.

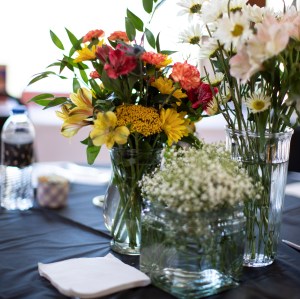
Now I think most people would have thought this would have been a nightmare to execute with 50+ guests, but actually, it was pretty simple. All the centerpieces were not finished arrangements, they were just flowers in vases.
 The supplies you need to make a floral crown is as followed:
- Flowers
- Thick Wire (12 gauge wire) for the base of your crown
- Florist Wire (24 gauge wire) to attach your flowers to your crown
- Cutting tools (scissors and wire cutters)
First: Wire Base: For our event, we pre-made the base of the crown and put a wire ring on everyone’s place setting. We left about 2 inches extra that people could make the base of their crown larger. The extra wire was just wrapped around the ring.
Second: Cutting Flowers: I instructed everyone to be generous while they were cutting their flowers, making sure that flower stem had at least 2-3 inches.
Third: Attaching Flowers: Take 2-3 flowers or greens to a make mini bouquet in your hand, lay it against your wire base. Pinch your mini bouquet with your wire crown and secure, by wrapping your florist wire around the whole bunch multiple times. If your florist wire has a tail/extra wire, don’t worry, you can use to help attach your next mini bouquet.
Forth: Repeat, the third step over and over until you are happy with your floral crown. Make sure that as you make your mini bouquet that you lay your new bouquet on the stems of your other bouquet, to cover them up. Your Flowers should all be going the same direction around your flower crown.
Now your florals can go all the way around your crown, or you can make an asymmetrical floral crown, the choice is yours!

Photography: Kali Marie Photography
